
Introduction to #Rubberdamology: Mastering the Foundations of Isolation
Good day, dear colleagues, doctors, and dental students! Welcome to the comprehensive #Rubberdamology self-training curriculum. My name is Dr. Apokin, and I am a general dentist. Over my 25-year clinical career, I have traveled to different cities and countries conducting hands-on workshops. Today, I want to welcome you to a streamlined, free online educational program designed to elevate your everyday manual skills and predictable clinical results.
Many dentists look at advanced isolation and think it is too complicated or time-consuming. But the secret to seamless rubber dam application isn’t magic—it is ergonomics, structure, and muscle memory. If you organize your workspace correctly and master the basic mechanical laws of isolation, you will save material, save time, and protect your patient’s safety in every single case, every single hour.
In this first phase of our curriculum, we focus strictly on Infrastructure and Kit Standardization. Before we ever touch a patient’s mouth, we must look at our bench-top setup as a high-precision operating zone.
The Core Pillars of Your Baseline Setup
1. The Physics of Workspace Stability
True manual dexterity begins with a completely stable environment. We don’t believe in using expensive, bulky phantom heads for home or office self-training. Instead, we borrow a brilliant, budget-friendly solution from professional photography: a heavy-duty desk crab-clamp and a multi-jointed, variable-friction SmallRig magic arm. By securing your dental models orthogonally—directly in front of your torso facing your eyesight or camera—you force your wrists and fingers into correct clinical operating vectors from day one.
2. Typodont Engineering & Component Upkeep
A dental model is not a static toy; it is a dynamic, modular simulator. Using advanced typodonts with flexible rubber gums and individual screw-retained crowns, you will practice realistic tooth preparations and clamp stress testing. When a plastic tooth becomes worn down from active drilling, you must master the precise maintenance routine: supporting the vestibular crown surface firmly while unscrewing the micro-fastener from the underside. This workflow preserves the socket and ensures your simulator always maintains a perfect, anatomically correct occlusion.
3. Standardization of the Isolation Armamentarium
Clinical chaos is the number one reason why dentists abandon the rubber dam. Searching for scattered clamps mid-procedure wastes time and breaks concentration. We teach you to organize a unified “Solo Isolation Vault”—a single container equipped with a custom-designed upright clamp organizer plate, heavy-duty punch wheels, and light-tension forceps. Keeping your tools sequentially mapped and in front of you creates a clean, repeatable, and stress-free routine.
4. Anatomy of Single-Tooth Isolation
Once your bench is organized, your isolation journey begins with the absolute basics: single-tooth endodontic isolation of a maxillary central incisor. Here, you will learn the strict physical orientation of asymmetric anterior butterfly clamps, such as the #210. You will practice tensioning the elastic canvas cleanly on a metal U-frame, executing template-free midline punches, and safely using a sharp dental explorer probe to peel the rubber margins off the metal clamp wings.
The Master Rule
As you step onto the #Rubberdamology learning curve, remember this absolute law: Your hand skills are completely universal. While top-tier consumables like high-elasticity latex sheets give you maximum operating comfort, the ultimate goal of these exercises is to train your hands. Once you master the techniques in this course, you will be fully capable of achieving a perfect moisture seal using any basic isolation kit available in your hospital or clinic.
Let’s organize our instruments, lock down our desk clamps, and begin our first practical exercise!
If you have any questions during your training, feel free to write them in the comments below, and do not forget to register on our official educational platform, rubberdamology.com. See you in the next module!
The transition from theoretical polymer chemistry and metallurgical force vectors to fluid clinical execution requires a disciplined, reproducible training track. To bridge the gap between abstract physics and real-time operatory precision, the clinician must master specific manual workflows in a highly controlled environment.
This chapter outlines the definitive practical curriculum of the #RUBBERDAMOLOGY Phantom Training Track, structured as a series of engineering-grade manual exercises. Executing these exercises under optical magnification (loupes or dental microscope) builds the tactile muscle memory and ergonomics necessary to maintain absolute field decontamination across all clinical variations.
8.1 Section #RUB001 – Armamentarium (Organizing Working Place and Phantom Setup)
Exercise 1: Organizing Working Place Ergonomics (Part 1)
- Target Video Mapping: #RUB001 – Lesson 1 (Video Session 008)
- Core Mechanical Objective: Establish a streamlined, zero-waste manual workflow layout.
- Practical Execution Sequence: Position the rubber dam frame, punch, forceps, and the complete TOR VM / Nictone clamp fleet within the primary manual reach zone. Calibrate the operatory overhead lighting and the precise focal distance of the optical magnification system to focus exactly on the midline of the target quadrant.
This lesson is a foundational guide on how to set up a home or office workstation for practicing rubber dam isolation techniques. Apokin Alexander emphasizes that high-quality self-training requires a stable and well-organized workspace.
Lesson Overview: Organizing Your Training Workspace
1. Exercise Transcription & Notes (Workspace Setup & Tooth Replacement)
This introductory module details how to engineer a high-stability, budget-friendly training workstation using photo-video hardware, and explains how to swap out worn individual teeth during cavity preparation and rubber dam clamping drills [00:30].
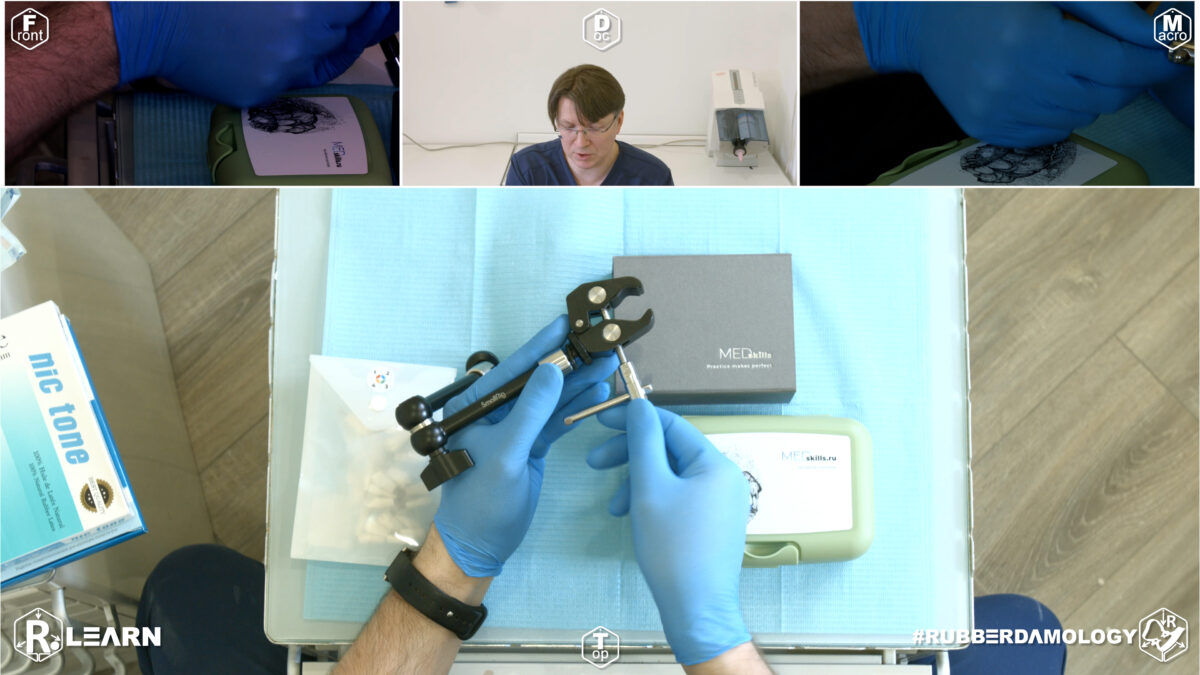
- Mounting the Training Rig:
- 1.Desktop Stabilizer Assembly:Rig Construction.
- Open the heavy-duty photography desk clamp and lock it securely onto the margin of your working bench [01:58]. Screw the base of your articulation “magic arm” (SmallRig brand) tightly into the clamp [03:16]. Lock the arm’s joints to position the mounting screw orthogonally—straight out from your torso facing toward your camera or eyesight [02:07].
- 2.Typodont Hinge Stabilization:Anatomical Mounting.
- Thread the base plate screw of your Med Skills maxillary or mandibular jaw model directly onto the male thread at the tip of the magic arm [03:02]. Tighten firmly until the jaw is immobilized. Ensure that when combining both jaws, they interlock cleanly to reflect a normal, anatomical occlusion [04:03].
- 3.Isolating and Unscrewing a Damaged Tooth:Maintenance Routine.
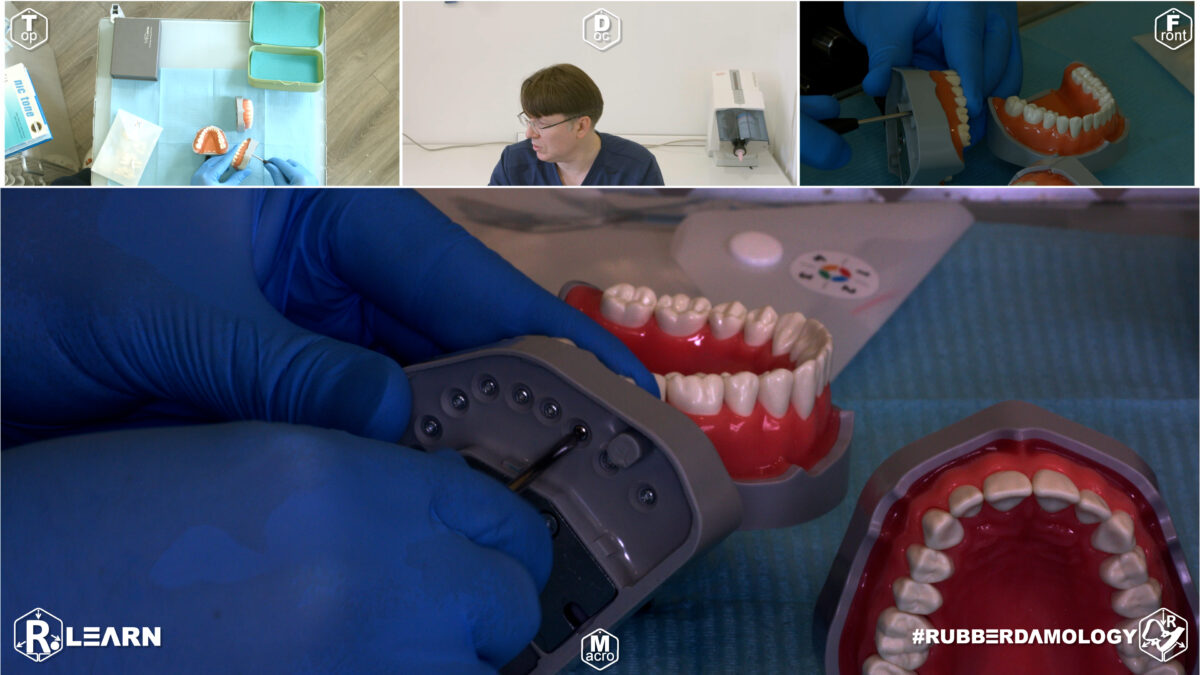
- When a plastic tooth becomes worn down from repeated cavity prep routines, hold the facial/vestibular surface of the target crown firmly with your fingers [03:59]. Flip the model upside down and use a simple cross-head or flat screwdriver to release the tiny retaining fastener from the underside of the gingival socket [05:34].
- 4.Typodont Socket Preservation:Reassembly Protocol.
- Extract the compromised plastic tooth from the rubber gum slot [05:48]. Select a fresh anatomical replacement tooth labeled with the correct quadrant number (e.g., Tooth #16 or an upper premolar) [06:24, 07:59]. Push the new plastic root flush into the socket and torque the retention screw securely back into place from behind [06:39].
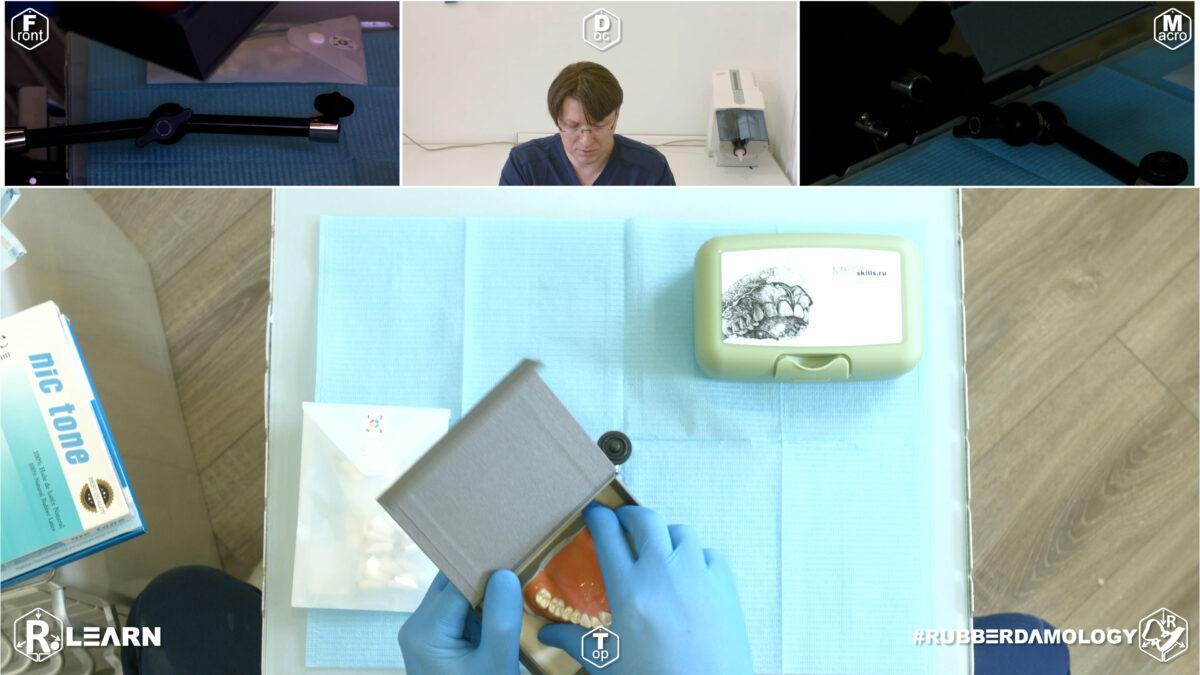
- Brand: Apokin Alexander recommends models from MedSkills due to their rubber gingiva and high-quality plastic teeth [02:30].
- Interchangeability: Every tooth can be unscrewed and replaced, which is essential for practicing on specific “damaged” or missing tooth scenarios [04:59].
- Replacement Process: Simply unscrew the tooth from the bottom of the model to swap it for a new one [05:34]. Replacement teeth are organized by quadrant numbers (e.g., 1, 2, 3, 4) in individual bags [07:57].
- Replacing a Tooth on the Model:
- The instructor shows how to replace broken or worn-out plastic teeth on the model [04:59].
- Using a simple screwdriver, the screw holding the tooth from the underside of the model is unscrewed [05:34].
- The old tooth is pulled out [05:48], a brand new anatomical tooth replacement matching the correct quadrant number is inserted [06:34], and then tightened back into place with the screw [06:39].
2. Mentioned Items & Concepts (Equipment & Kit List)
The following toolkit is showcased as the primary inventory required to progress through the core rubber dam training regimen:
- Fixation Hardware:
- Desk Crab Clamp & SmallRig Magic Arm: Photo-video rigging gear repurposed to substitute for a bulky, expensive phantom head workstation [01:16, 03:16].
- Anatomical Simulation Systems:
- Med Skills Typodont Jaws: High-fidelity anatomical training jaws consisting of a flexible rubber base/gum layer and individual screw-retained replacement teeth [02:30].
- Quadrant-Sorted Replacements: Individual replacement tooth packs organized inside plastic bags mapped to Quadrants 2, 3, and 4 [07:59].
- Isolation Armamentarium:
- Sanctuary Dental Rubber Dam Puncher: Heavy multi-wheel punch to create precise, tear-resistant canvas perforations [09:00].
- Sanctuary Dental Lightweight Forceps: Slender, light-tension forceps used to handle and expand rubber dam clamps [10:07].
- KSK/Ash Style Forceps: The instructor’s preferred daily-driver clamp forceps featuring specialized tip curvature for predictable clinical control [10:30].
- Restorative Matrix Rings:
- Polydentia Universal Ring Forceps: A versatile forceps designed to stretch sectional matrix rings [11:25].
- Tor VM Sectional Forceps: A specialized alternative optimized to handle Class II restorative rings from various manufacturers [11:29].
- Isolation Consumables:
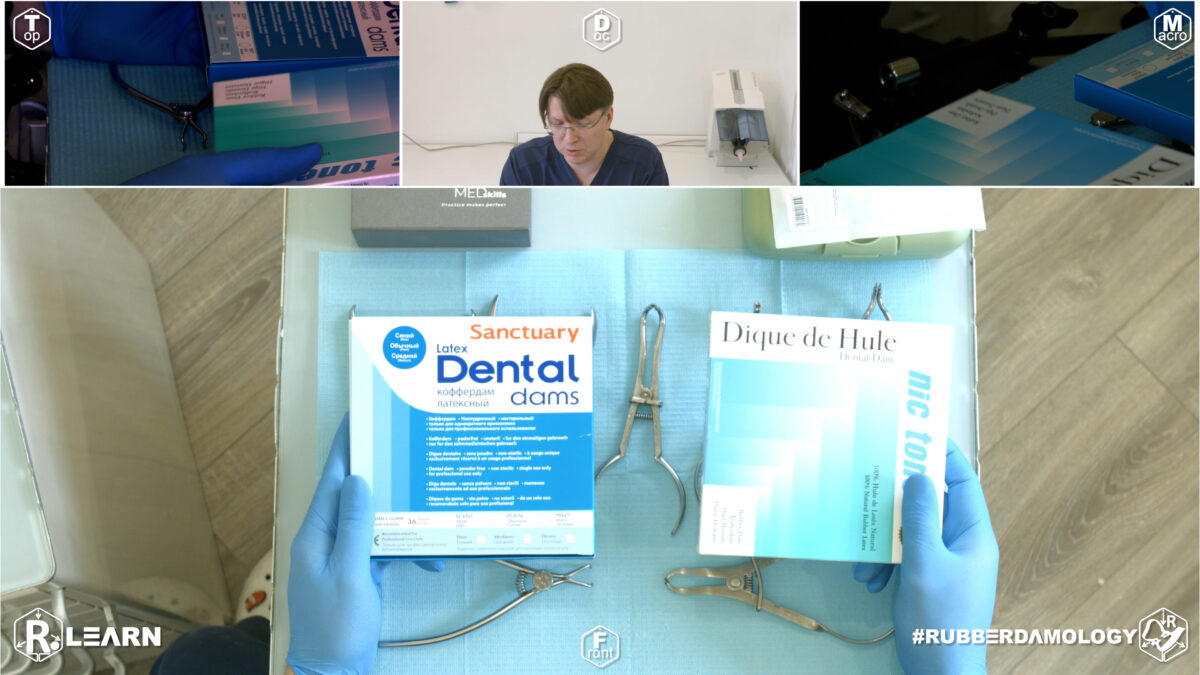
- Nic Tone & Sanctuary Dental Canvas Sheets: Training media available in both latex and non-latex variants, featuring varying colors (green, blue, purple) and material grades (thin, heavy) [12:13].
- Dental Models (Typodonts):
- Upper & Lower Jaw Models: Sourced from Med Skills [02:30, 03:44]. Features a rubber base/gum and unscrewable plastic teeth that replicate normal occlusion when combined [04:03].
- Replacement Teeth: Organized individually in plastic bags labeled by quadrant numbers (e.g., Quadrants 2, 3, and 4) [07:59].
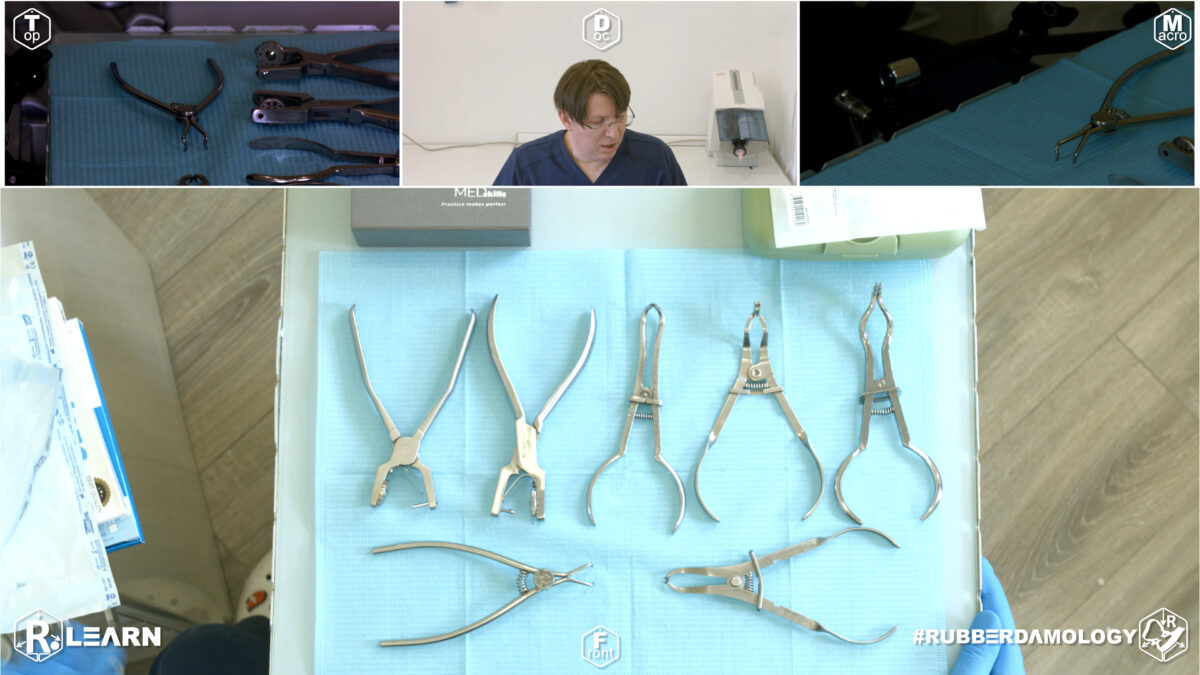
Apokin Alexander showcases a variety of professional tools required for the course [08:43]:
- Rubber Dam Instruments:
- Rubber Dam Puncher: A tool by Sanctuary Dental used to punch clean holes in the dam [09:00].
- Forceps / Pillars: Multiple varieties are displayed. A thin and lightweight model of dam clamp forceps from Sanctuary Dental is introduced [10:07], alongside the instructor’s preferred everyday choice: KSK (or Hu-Friedy styled) / Ash design clamp forceps [10:30].
- Matrix Ring Forceps: Polydentia universal ring forceps and Tor VM specialized ring forceps used for training Class II matrix band restorations [11:13].
- Consumables:
3. Key Takeaways & Conclusions
The goal of this setup is to “train your hand skills” [12:58]. By using high-quality models and a stable mounting system, you can effectively bridge the gap between theoretical knowledge and clinical practice in a comfortable home environment.
- Repurposing Photography Gear Yields Rigid Ergonomics: Leveraging industrial photo/video accessories (a desk clamp and a jointed SmallRig magic arm) provides an exceptionally rigid, vibration-resistant mount for typodonts. This approach matches the stabilization of clinical phantom units at a fraction of the cost.
- Orthogonal Alignment Prevents False Hand Habits: Always secure the typodont in a strict orthogonal orientation relative to your workspace. This setup forces your wrists and fingers into true clinical operating vectors, preventing the development of improper angles that fail when treating a real patient.
- Raw Manual Dexterity Overrides Brand Dependence: While high-end consumables (like Nic Tone heavy sheets and KSK forceps) provide maximum daily comfort, the master goal of this curriculum is developing foundational muscle memory. You can successfully complete these advanced isolation exercises using any basic rubber dam punch and kit currently available in your clinic or department [12:58].
This section is formatted to serve as the introductory pillar for Chapter 8 of your textbook, CARIOLOGY: Science, Protocol, and Clinical Execution.
Foundations of Workspace Ergonomics and Tray Architecture
The success of absolute isolation—and by extension, the longevity of adhesive restorations—begins long before the clamp touches the tooth. It begins with the architecture of the workspace. A cluttered or disorganized tray forces the clinician to divert attention from the surgical field to the instrument deck, breaking the “flow” of the procedure and increasing the risk of contamination or procedural error.
+-----------------------------------------------------------------------------+
|                      WORKSPACE ARCHITECTURE: THE VAULT SYSTEM               |
+-----------------------------------------------------------------------------+
|                                                                             |
|   [ PRINCIPLE 1: STANDARDIZATION ]                                          |
|    - Every instrument has a fixed coordinate on the tray.                   |
|    - Reduces cognitive load; allows muscle memory to guide retrieval.       |
|                                                                             |
|   [ PRINCIPLE 2: MOVEMENT ECONOMY ]                                         |
|    - Keep instruments within the primary radius (15-20cm from the field).   |
|    - Minimize reaching/twisting; conserve energy for fine motor tasks.      |
|                                                                             |
|   [ PRINCIPLE 3: THE STERILE DIVIDE ]                                       |
|    - Segregate clean adhesive materials from soiled isolation hardware.     |
|    =====> EFFECT: Prevents iatrogenic cross-contamination.                  |
|                                                                             |
+-----------------------------------------------------------------------------+
The “Vault” Philosophy
The chairside workspace should function as a “vault”—a self-contained, highly organized environment where the clinician does not need to hunt for components. Rubber dam application is a series of precise mechanical steps (punching, clamping, inverting, ligating). If the clinician is forced to interrupt these steps to reorganize the tray, the patient’s comfort levels drop, and the probability of moisture leakage increases due to prolonged exposure.
1. Tray Standardization
The armamentarium for isolation—the puncher, the clamp forceps, the U-frame, and the clamps themselves—must occupy the same geographic location on the tray in every single appointment. By treating the tray setup as a static, repeatable pattern, the clinician builds “procedural intuition.” You should be able to reach for the perforation punch without looking down.
2. The Movement Radius
Ergonomics is governed by the “Movement Economy.” Every time the clinician must over-extend their arm or rotate their torso to reach a clamp, time is wasted and focus is diluted. The tray must be positioned to keep the core isolation kit within the primary reach radius.
3. Material Segregation
A critical error in rubber dam application is mixing “soiled” hardware (used clamps, contaminated floss) with “clean” adhesive materials (composites, bonding agents). The workstation should be clearly bifurcated:
- The Isolation Zone: Where the heavy hardware (clamps, frame, puncher) is handled.
- The Adhesive Zone: A pristine area dedicated to restorative materials.
By mastering the ergonomics of the workspace in Exercise 1, the clinician prepares the mental and physical terrain for the high-precision tasks that follow in this chapter. Before picking up a puncher, the clinician must have mastered the layout of the field.
Exercise 2: Organizing Working Place Ergonomics (Part 2)

- Target Video Mapping: #RUB001 – Lesson 2 (Video Session 015)
- Core Mechanical Objective: Standardize accurate geometric hole placement.
- Practical Execution Sequence: Adapt the unstretched latex plate onto the coordinating template marker. Calibrate and trace the specific anatomical arch markings, ensuring that the distance between perimeters accounts for variations in tooth size before initiating the cutting step.
1. Exercise Transcription & Notes (Articulated Rig Assembly)
In this video, Dr. Alexander Apokin demonstrates an alternative, more advanced method for organizing the training workspace by assembling a full articulation system (articulator) for both the upper and lower jaw models, rather than mounting a single jaw with a direct screw thread [01:00].
- Assembling the Jaw Models to the Articulator:
- The instructor starts with the lower jaw model. He unscrews the integrated model fixator screw on the articulator frame, places the lower jaw model into the slot, and uses a key/screwdriver to tighten it securely [01:33].
- He repeats this exact process for the upper jaw model, mounting it onto the upper arm of the articulator [01:53].
- To align them correctly, he fits the upper and lower jaws together into a state of normal, orthognathic occlusion [02:12]. Once perfectly aligned, he tightens the central fixation screw on the upper jaw frame [02:27].
- He notes that there is a distal screw available to adjust interdental space or create disclusion (keeping the jaws slightly open) [02:31], but he keeps it in the traditional position so the upper and lower teeth remain in direct contact [02:42].
- Mounting the Articulator to the Desk Rig:
- The instructor introduces a second photography clamp attached to his existing SmallRig “magic arm” [02:53].
- He connects this clamp directly to the distal hinge bar of the assembled metal articulator [02:59].
- He emphasizes screwing the clamp fixation “as hard as you can” [03:21] because heavy hand pressure will be applied during rubber dam isolation practice, and the unit must not shift.
- For optimal structural support, he positions the magic arm so that the lower frame of the articulator rests directly on the table surface before fully locking the arm’s joints [03:40].
2. Mentioned Items & Concepts (Equipment & Mechanics)
- Mounting Gear:
- Dental Models & Hardware:
- Upper and Lower Plastic Jaws: Anatomical typodont models representing teeth and gums [01:24].
- Metal Articulation System (Articulator): A mechanical hinge device that accepts various plaster or plastic models [01:11]. It allows the jaws to open, close, and mimic human jaw movements.
- Central Fixation Screw: The screw in the middle of the upper jaw holder used to lock the model into static occlusion [02:27].
- Distal Disclusion Screw: Located at the back of the articulator frame to manually set a fixed gap between the upper and lower teeth [02:31].
- Anatomical & Technical Terms:
- Orthognathic Occlusion State: The normal, resting bite position where upper and lower teeth interlock properly [02:12].
- Caspits (Cusps) vs. Clamp Arcs: The anatomical chewing points of the teeth (cusps) and how they spatially relate to the metal bow/arc of a rubber dam clamp when the mouth closes [04:30].
3. Key Takeaways & Conclusions
- Understanding Occlusal Relationships: The main benefit of using a dual-jaw articulator setup instead of a single jaw is the ability to closely study how the cusps of the upper teeth interact with rubber dam clamp arcs when the jaws close [04:30]. This helps prevent choosing clamp placements that interfere with the patient’s bite.
- Universal Frame Compatibility: The showcased articulation frame is highly versatile; its adjustable structural screws mean it can be modified to hold almost any brand or style of plastic or plaster dental model [01:11].
- Leveraging Bench Friction: When locking a heavy dual-jaw articulator to a magic arm, resting the base of the articulator directly on the table surface spreads the mechanical load. This dramatically cuts down on vibration and joint slippage during rigorous hand-skills training [03:40].
Key Highlights for Your Workstation Setup
- The Articulation System: Instead of just mounting a single jaw, Apokin Alexander uses an articulation system that allows both the upper and lower jaws to be mounted together. This simulates a natural occlusion (the way teeth meet) [01:00].
- Mounting the Models: * The lower jaw is secured into the fixator using a screw and key [01:33].
- Simulating Mouth Opening: The articulation system includes a distal screw that can be used to set a specific “disclusion” (gap), or it can be left in the traditional position where the teeth contact [02:31].
- Stable Fixation with the “Magic Arm”:
- Clinical Benefit: This dual-jaw setup is particularly useful for understanding the relationship between the cusps of the upper teeth and the rubber dam clamp arcs on the lower teeth, ensuring the clamps don’t interfere with the patient’s bite [04:30].
This setup provides a stable, “cheap,” and effective way for students and dentists to master their manual skills outside of the clinic [04:42].
This section is designed to follow the foundational ergonomics of Exercise 1, moving the focus from the tray setup to the dynamic clinical workflow.
Dynamic Ergonomics, Assistant Synchronization, and Patient-Centered Isolation
While Exercise 1 focuses on the static architecture of the workspace, Exercise 2 addresses the “human dynamics” of the procedure. Absolute isolation is rarely a solo endeavor; it is a synchronized dance between the dentist, the dental assistant, and the patient. Inefficient movement during the critical seconds between removing the dam from the tray and seating it intraorally is the primary cause of isolation failure and patient anxiety.
+-----------------------------------------------------------------------------+
|               DYNAMIC ERGONOMICS: THE FOUR-HANDED WORKFLOW                  |
+-----------------------------------------------------------------------------+
|                                                                             |
|   [ PRINCIPLE 1: THE ASSISTANT'S ROLE ]                                     |
|    - The assistant is the stabilizer, not a passive holder.                 |
|    - Precise transfer of the U-frame ensures the dentist's hands are free.  |
|                                                                             |
|   [ PRINCIPLE 2: AIRWAY INTEGRITY ]                                         |
|    - The "1cm Flap" Rule: Protect the nose; maintain nasal breathing.       |
|    - Constant patient-centric positioning avoids the gag reflex.            |
|                                                                             |
|   [ PRINCIPLE 3: THE TRANSITION ]                                           |
|    - Minimize "Air Time": The rubber dam should move from tray to mouth     |
|      without interruption or hesitation.                                    |
|                                                                             |
+-----------------------------------------------------------------------------+
The Assistant-Dentist Synchronization
A frequent source of procedural failure is the lack of coordination during the “handover.” When the dentist is occupied with the perforation puncher or the clamp forceps, the assistant must be prepared to manage the frame. However, this must be done with precision. The assistant is not merely holding the rubber; they are maintaining the optimal geometric tension required for the dentist to instantly identify the anchor tooth position.
Erratic movement by the assistant forces the dentist to “hunt” for the position of the clamp or the perforation hole, resulting in unnecessary pressure on the patient’s gingiva and potential tissue trauma.
Patient-Centered Isolation
The rubber dam is often the patient’s primary source of anxiety during a dental appointment. Dynamic ergonomics includes the constant management of the patient’s respiratory comfort.
- The Nasal Airway: As established in Exercise 1, the sheet must be mounted asymmetrically. In this dynamic phase, it is the clinician’s responsibility to ensure the top flap of the rubber dam remains pulled tight, preventing it from drooping over the patient’s nose.
- The “Catchment” Envelope: The patient must be able to swallow without their saliva flooding the working field. The dynamic construction of the “envelope” (folding the bottom edge of the sheet) is not just for debris management; it is a critical ergonomic comfort feature that keeps the patient dry and relaxed.
The “No-Idle” Workflow
In professional rubber dam isolation, there is no “idle” time. While the dentist focuses on the precise inversion of the rubber septum around the tooth neck using dental floss or a probe, the assistant is responsible for maintaining the stability of the frame and managing the suction (HVE) within the catchment envelope. This division of labor reduces the total procedure time, which directly correlates to higher patient satisfaction and a lower probability of the rubber dam losing its seal due to prolonged patient movement.
By mastering the dynamic interaction with the assistant and maintaining strict airway integrity, the clinician transforms isolation from a “time-consuming setup” into a seamless, automatic entry point for every restorative procedure.
Exercise 3: Instrument Inspection and Calibration

- Target Video Mapping: #RUB001 – Lesson 3 (Video Session 016)
- Core Mechanical Objective: Eliminate mechanical errors from worn equipment.
- Practical Execution Sequence: Perform a technical audit of the punch cutting wheel and the retaining forceps jaws. Check for any micro-nicks on the cutting rims or positional drift in the engagement tips. The cutting wheel must punch clean, sharp circles through an extra-heavy latex sheet with zero threading.
1. Exercise Transcription & Notes (Armamentarium & Clamp Orientation)
Dr. Alexander Apokin discusses the organization of a comprehensive student kit (armamentarium) designed for self-training rubber dam isolation exercises [00:48]. He highlights organizing tools inside a dedicated storage container to maintain clean and efficient workflows [01:30].
- Organizing the Workspace Kit:
- The instructor reveals a standard plastic container historically optimized for student workshops. It is initially configured as a “dual set” for two partners working together, though he extracts a single solo-practitioner setup for this demonstration [01:30].
- Basic handheld instruments (mirror, explorer probe, filling instrument, and scissors) are laid out alongside primary rubber dam instruments [04:00, 04:29].
- The instructor heavily emphasizes using a Clamp Stand (Holder Plate) [03:01]. Keeping clamps upright and sequentially organized prevents them from getting tangled or lost, making selection and return seamless during multi-tooth isolation routines [03:11, 09:29].
- Crucial Butterfly Clamp Orientation Guidelines:
- Upper Jaw Central Incisors (Clamp #210): The instructor warns against a massive, common mistake seen across dental YouTube channels regarding butterfly clamps [07:29]. The broad, structural metal bow/arc must sweep down toward the incisal edge safely, not upward toward the soft tissue in an inverted fashion. Inverting the clamp makes proper matrix adaptation or access impossible [08:19].
- Lower Jaw Incisors (Clamp #9): Similarly, the anatomically curved wings/jaws must adapt correctly to the lower incisor anatomy. Reversing or flipping this clamp upside-down is labeled as improper practice [08:44].
2. Mentioned Items & Concepts (The Complete Inventory)
The following toolkit is extracted from the storage box and structurally categorized:
- Core Isolation Instruments:
- Aids & Diagnostics:
- Intraoral Mirror (Medium): Used to check lingual/palatal spaces behind the rubber dam barrier [04:00].
- Explorer Probe & Flat Plastic Instrument: Basic diagnostics and seating the rubber dam material below the clamp wings [04:29].
- Dental Scissors & Marker: For cutting sheets/floss and marking tooth anatomical patterns onto the rubber dam sheet [04:00, 04:29].
- Restorative & Interdental Accessories:
- Matrix Rings: Dual sectional matrix rings by Tor VM used for simulating Class II setups [04:44].
- Sectional Matrix Bands & Interdental Wedges: Assorted varieties for restoring interproximal walls [06:00].
- Separator/Extractor: A heavy mechanical separator tool (resembling a Dentech separator) from a Pakistani manufacturer, used for advanced space creation exercises [05:02].
- Curated Training Clamp Set:
- Clamp #210 & #9: Classic anterior “butterfly” clamps for upper and lower incisors [07:12, 08:44].
- Clamps #1 & #2: Premolar and canine clamps; perfect as a pair for isolating full anterior arches from premolar to premolar [09:51, 10:15].
- Clamp #14: Retentive molar clamp, excellent for small or partially erupted molars [11:10].
- Clamp #12A: “Tiger” clamp, an asymmetrical serrated molar clamp specifically contoured for upper-left or lower-right molars [11:59].
- Clamp #7: Flat-jawed lower molar clamp with flat, comfortable seating angles from gingiva to occlusion [13:12]. Features extra dual utility holes for secondary floss ligatures or instrument seating [13:29].
- Brinker Gingival Retractors (B1, B2, B3, B4): Specialized subgingival retractors by Tor VM [14:06]. B2 and B3 are specialized for left/right premolars [14:29], while B1 and B4 offer deep subgingival grip on molar necks, opening massive clearance for crown preparations and prosthetic cementation [15:40].
3. Key Takeaways & Conclusions
- Standardized Work Packages: Creating a single, unified “isolation box” containing your punch, forceps, frames, basic hand instruments, and an organized clamp plate minimizes setup time and streamlines daily self-training.
- Anatomical Orientation Limits: Butterfly clamps (#210 and #9) are highly non-symmetrical in their application. Reversing their vertical orientation creates an improper mechanical angle that can harm a patient’s gingiva or block clinical vision completely.
- Specialized Subgingival Access: Standard molar clamps sometimes fail when cavities go deep beneath the gum line. The inclusion of the Brinker series (B1–B4) in an educational kit is essential because it trains the hand to achieve ultra-deep subgingival anchoring, which is critical for successful prosthetic margins and adhesive bonding.
This section is designed to bridge the gap between workspace ergonomics and technical execution, establishing that the precision of the isolation field is entirely dependent on the calibrated integrity of the armamentarium.
Instrument Inspection, Calibration, and Lifecycle Management
A high-performance isolation setup is only as reliable as its weakest mechanical link. In clinical practice, the “catastrophic failure”—a rubber dam tearing during placement or a clamp slipping due to loss of tension—is rarely an accident. It is almost always the result of degraded instrumentation. Exercise 3 establishes the protocols for regular inspection and calibration, shifting the clinician’s mindset from “repairing failures” to “preventing them.”
+-----------------------------------------------------------------------------+
|                      INSTRUMENT INTEGRITY PROTOCOLS                         |
+-----------------------------------------------------------------------------+
|                                                                             |
|   [ PRINCIPLE 1: THE CLEAN CUT ]                                            |
|    - Verify punch wheel alignment daily; avoid "bridge" or "hangnail" tears.|
|    =====> EFFECT: Prevents tear propagation under high-tension stretching.  |
|                                                                             |
|   [ PRINCIPLE 2: SPRING FATIGUE ANALYSIS ]                                  |
|    - Test clamp "snap" memory before every procedure.                       |
|    - Recognize the difference between a resilient spring and a fatigued one.|
|                                                                             |
|   [ PRINCIPLE 3: PIVOT POINT ALIGNMENT ]                                    |
|    - Ensure forceps tips seat perfectly into clamp holes.                   |
|    - Avoid "slippage incidents" caused by misaligned forceps tips.          |
|                                                                             |
+-----------------------------------------------------------------------------+
The Punch Wheel Calibration
The most frequent cause of rubber dam failure is an imperfect perforation. If the punch wheel is loose, the tip is worn, or the cutting edge has developed microscopic “burrs,” the hole will not be a perfect, smooth circle. It will have jagged edges.
- The Diagnostic Test: Punch a test hole into a scrap piece of rubber. Stretch it. If a “hangnail” (a small, jagged tag of un-cut rubber) or a “bridge” (incomplete cutout) appears, the instrument must be professionally sharpened or retired. A jagged perforation acts as a stress riser; under the tension of placement, the rubber will propagate a tear from this imperfection instantly.
Clamp Fatigue and Tension
A rubber dam clamp is, at its core, a calibrated spring. Through repeated sterilization cycles (autoclaving), metal undergoes thermal fatigue.
- The Tension Audit: Before an appointment, apply the clamp to a diagnostic model or a test tooth. The clamp must seat with a firm, audible “snap.” If the clamp jaws sit passively against the tooth neck without significant resistance, it has lost its tension memory. A clamp that does not “bite” will inevitably migrate subgingivally or dislodge under the movement of the patient.
Forceps Alignment and Grip Mechanics
The relationship between the clamp forceps and the clamp itself is the “pivot point” of the entire isolation procedure. Misaligned or worn-out forceps tips lead to incomplete gripping of the clamp, which can cause the clamp to “pop” unexpectedly while being transported to the tooth.
- Calibration Check: Inspect the tips of your forceps under magnification. Are they perfectly symmetrical? When closed, do they offer a rigid, lock-like engagement with the clamp holes? If the forceps allow for any lateral “wobble,” they are a liability. Precision forceps ensure that the clamp moves exactly where the clinician directs, essential for reaching deep into the distal embrasures of second and third molars.
The Lifecycle Strategy
Equipment is not permanent. By integrating a pre-procedural inspection routine, the clinician manages their “inventory of reliability.” This is not merely housekeeping; it is the final verification step that guarantees when the rubber dam is placed, the integrity of the moisture barrier will be absolute, leaving the clinician free to focus on the chemistry of the adhesive bond rather than the mechanics of the barrier.
Exercise 4: Modeling Hard Tissue Defects on Plastic Teeth

- Target Video Mapping: #RUB001 – Lesson 4 (Video Session 021)
- Core Mechanical Objective: Replicate realistic clinical hard tissue collapse.
- Practical Execution Sequence: Replace standard intact plastic teeth within the jaw model with specialized configurations featuring simulated Class II proximal box drops, missing marginal ridges, and severe Class V subgingival abfraction perimeters.
1. Exercise Transcription & Notes (Simulating Edentulous Spaces for Advanced Isolation)
In this video, Dr. Alexander Apokin explains how to prepare dental typodont models for advanced rubber dam isolation training by strategically removing individual plastic teeth or groups of teeth [00:39]. This creates simulated edentulous spaces (partial dental gaps) to train for complex clinical scenarios [02:45].
- Creating a Partial Dental Gap (Tooth Removal):
- The instructor focuses on the upper right quadrant of a Med Skills model to create a localized area of missing teeth [02:45].
- He grips the tooth firmly from the vestibular (outer/facial) side with his fingers while unscrewing the matching retention screw from the underside of the model base [03:59].
- He removes the central incisor (Tooth #11), followed by the adjacent premolars and the first molar (Tooth #16) [02:45, 04:14, 06:30].
- He notes that if the model is brand new, the friction fit of the plastic root inside the socket might be quite tight, making manual extraction difficult; in such cases, dental forceps can be used to safely wiggle and pull the tooth out [03:14].
- The resulting edentulous gaps allow the student to practice advanced rubber dam adaptation, combining matrix rings, specialized clamps, and floss ligatures across spaces where standard contact points are missing [04:32].
- Reassembling and Maintaining the Typodont:
- To return the model to its standard configuration, the teeth are re-inserted into their designated anatomical sockets [05:15].
- The screws are threaded back in from the reverse side of the jaw base and tightened securely [05:51].
- The instructor strongly cautions the viewer to handle the tiny fixation screws with extreme care and avoid dropping or losing them, as these micro-screws are highly specialized and difficult to replace in a standard hardware store [05:35].
2. Mentioned Items & Concepts (Hardware & Mechanics)
- Dental Models & Hardware variants:
- Med Skills Jaw Models: The primary training typodonts featuring removable teeth [01:00].
- Retention Screws: The miniature threaded fasteners holding each tooth in place from the back of the base [05:35].
- Screw Drive Variations: The instructor points out that different production generations or models of typodonts utilize different screw heads—older or alternative versions use Hexagonal (Hex/Allen) or Torx (Star) configurations [01:41, 04:59], whereas the newer models shown use standard Phillips (Cross-head) screws [01:41, 05:59].
- Tools:
- Clinical Concepts:
3. Key Takeaways & Conclusions
- Customizing the Training Scenario: A standard, fully intact dental model is only sufficient for basic isolation exercises. By unscrewing and removing selective groups of teeth, students can infinitely customize their typodonts to mimic realistic, complex clinical challenges, such as isolating single standing teeth adjacent to edentulous spans.
- Tool Identification Before Training: Typodont hardware is not universally standard. Before beginning a rubber dam course, a student must inspect the underside of their model to identify whether it requires a Phillips, Hex, or Torx driver, ensuring they have the correct armamentarium ready on their bench.
- Hardware Preservation: The micro-screws utilized in dental training models are proprietary, easy to lose during fast-paced bench changes, and critical for structural stability. Keeping a small magnetic tray or cup on the training desk is highly recommended to protect these components during exercise modification.
This section is designed to bridge the gap between technical instrument preparation and the simulation of clinical reality, formalizing the methodology for the 4th module of your curriculum.
Modeling Hard Tissue Defects and Geometric Fidelity
The preceding exercises established the mechanical reliability of our tools. Exercise 4 marks the transition from maintenance to simulation. We cannot master rubber dam isolation—or any restorative protocol—by working on pristine, anatomical plastic teeth. To train for the clinical environment, we must create clinical “pathology” on our models. The objective of this exercise is to model hard tissue defects (Class II proximal boxes, Class V cervical erosions, and deep subgingival caries) that specifically challenge the limitations of our isolation field.
+-----------------------------------------------------------------------------+
|                      SIMULATION GEOMETRY: THE DEFECT-ISOLATION LINK         |
+-----------------------------------------------------------------------------+
|                                                                             |
|   [ PRINCIPLE 1: REALISTIC ANATOMICAL CHALLENGE ]                           |
|    - Simulations must mimic the margin depth of clinical pathology.         |
|    =====> EFFECT: Forces the clinician to find the limit of the isolation.  |
|                                                                             |
|   [ PRINCIPLE 2: MARGINAL ACCESSIBILITY ]                                   |
|    - Prepare boxes with intentional proximal overhangs or deep floors.      |
|    =====> EFFECT: Tests the limits of matrix adaptation and inversion.      |
|                                                                             |
|   [ PRINCIPLE 3: REPEATABILITY ]                                            |
|    - Standardize the "defect" to test multiple isolation strategies         |
|      (e.g., Brinker vs. Matrix Ring) on the exact same scenario.            |
+-----------------------------------------------------------------------------+
The “Defect-First” Mindset
Clinical isolation is not a general procedure; it is a defensive reaction to the specific location of a defect. By manually preparing defects (cavities) into your plastic teeth using a high-speed handpiece, you transform the phantom model from a stationary object into a dynamic clinical scenario.
- The Class II Challenge: Prepare proximal boxes with deep subgingival floors. This immediately forces the clinician to evaluate whether their rubber dam setup allows for the placement of a sectional matrix band without “bunching” or tearing the latex.
- The Class V Challenge: Prepare cervical abfraction-like lesions. This creates a geometric “void” that forces the student to implement Brinker-style gingival retraction, testing the stability of the cervical seal.
The Preparation-Isolation Continuum
The student must understand that the design of the preparation is the first step of the isolation process. If the cavity preparation is poorly designed (e.g., leaving a ragged enamel edge or a deep, inaccessible corner), no isolation system in the world can guarantee an absolute moisture seal. Exercise 4 demonstrates this continuum:
- Preparation: Creating the defect to mimic specific clinical challenges.
- Inspection: Evaluating the defect for potential isolation “dead zones.”
- Isolation: Implementing the barrier around the defect, rather than simply over the tooth.
Clinical Transferability through Simulation
By standardizing these defects, the clinician can perform “A/B testing.” You can prepare the same proximal box on three different teeth and attempt three different isolation strategies: a standard matrix, a customized wedge-and-ring setup, and a Brinker-assisted inversion. This iterative process builds clinical intuition—the “feel” for when a margin is too deep for a standard wedge and requires the addition of a cervical retractor.
Modeling these defects on plastic teeth bridges the gap between the static environment of a dental school lab and the unpredictable, high-stakes nature of the clinical chairside. The plastic tooth is no longer a model; it is a patient.